You have an IOS, so now what?
CAD software is the essential piece that connects IOS scanners to other CAD/CAM devices in the practice, like milling units and printers. We’ve tested every CAD software in the market today and, frankly, they’re too complex. Dentists don’t need a re-worked Lab software for their dental practice workflows – they need a Dentist software!
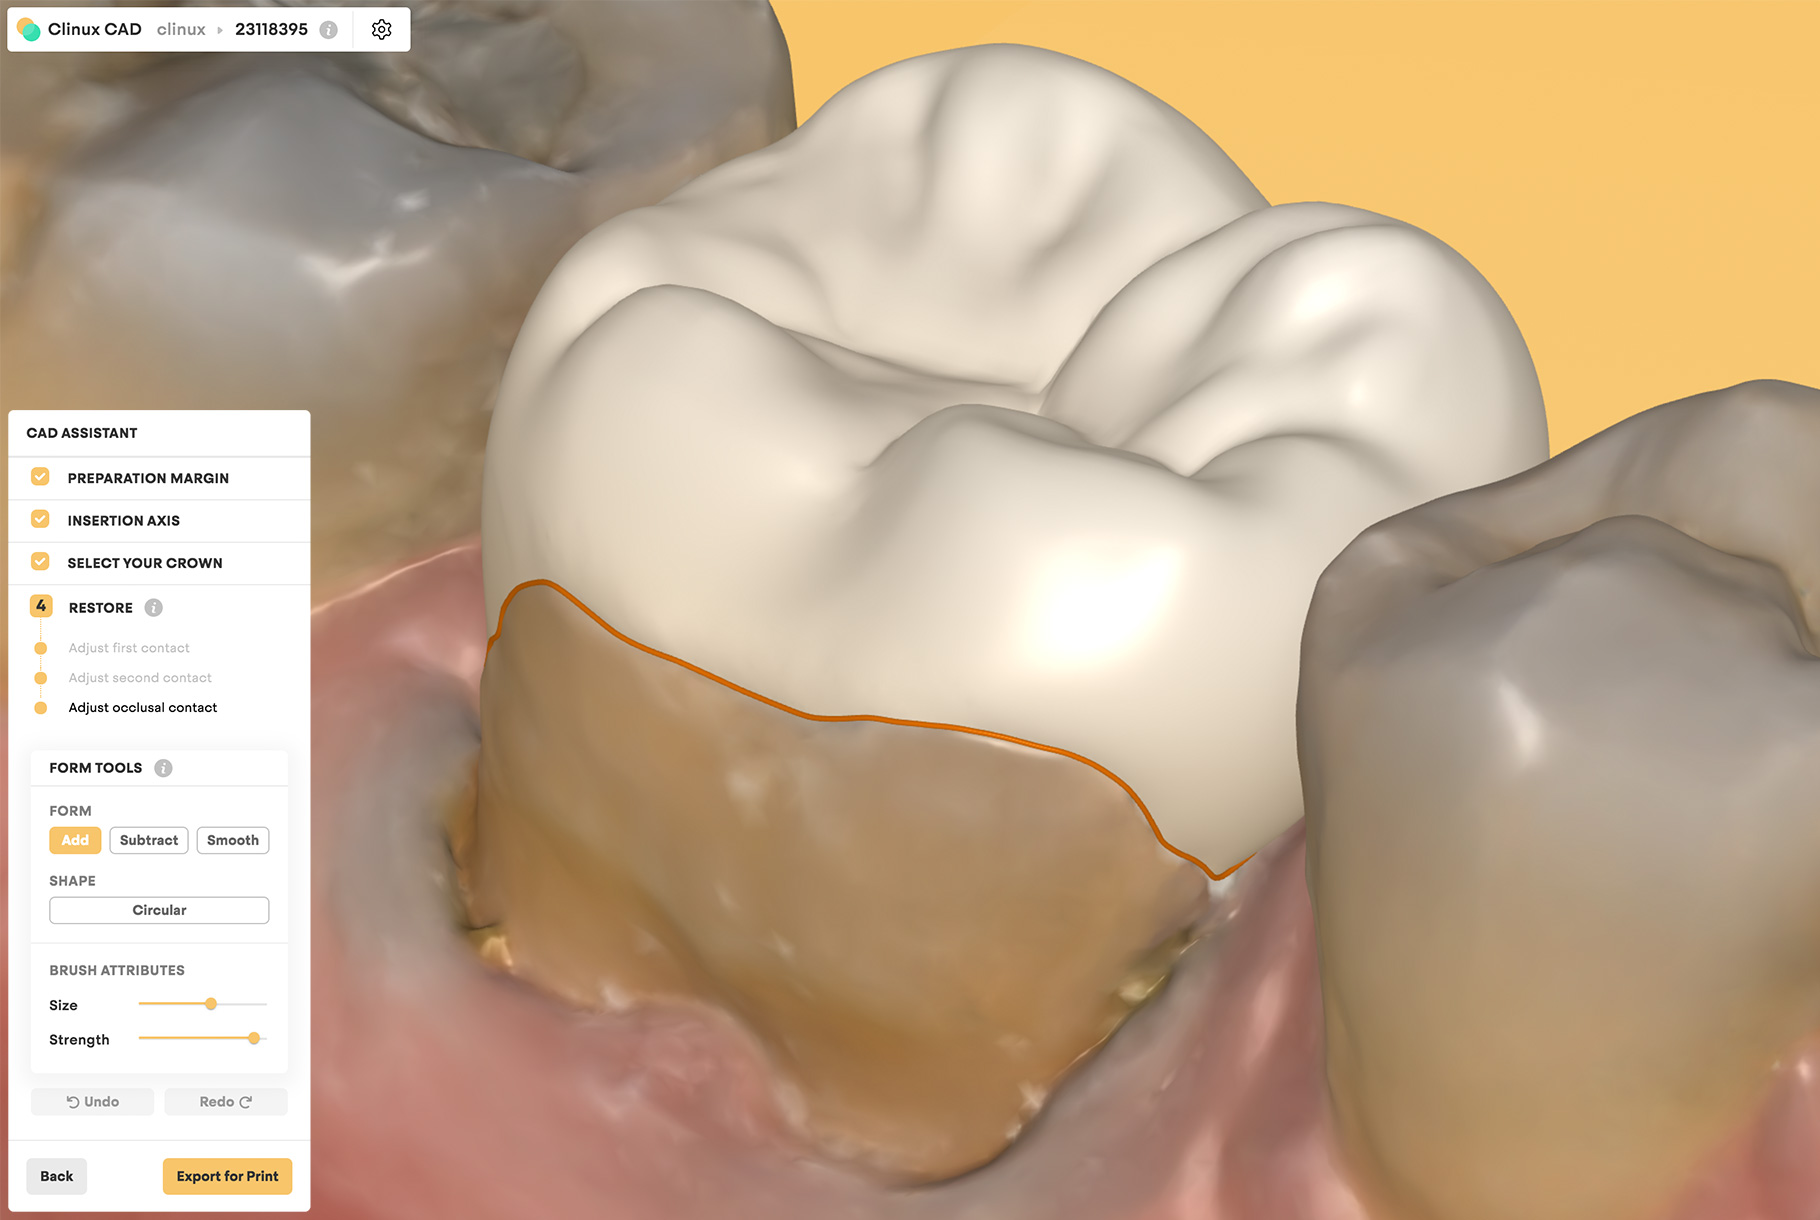
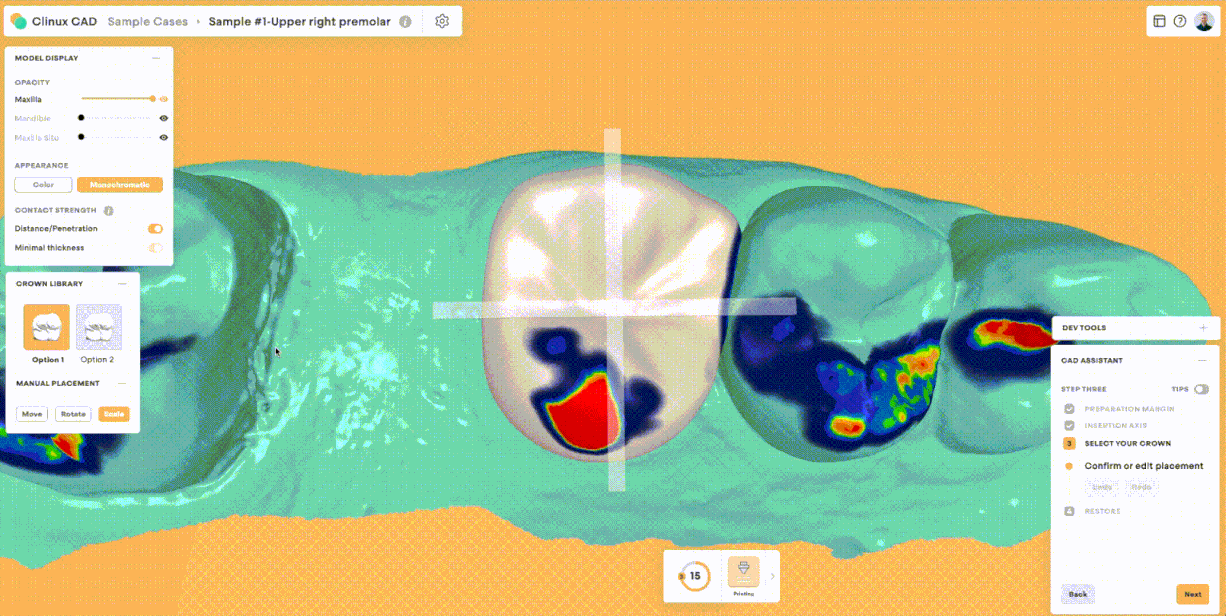
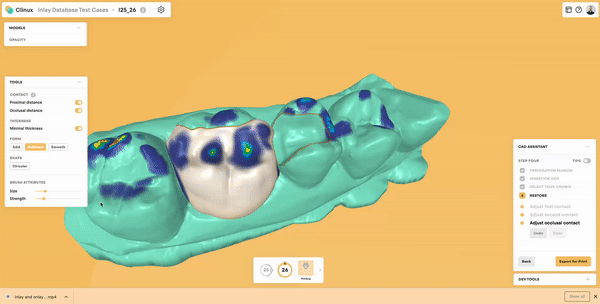
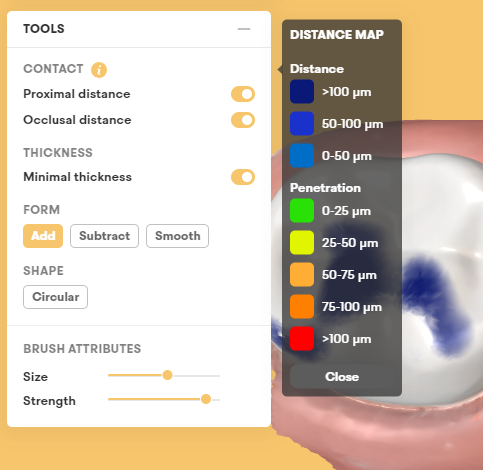
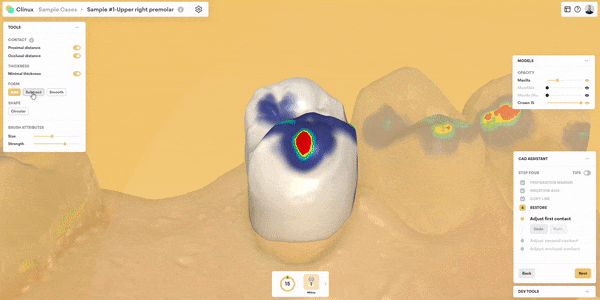
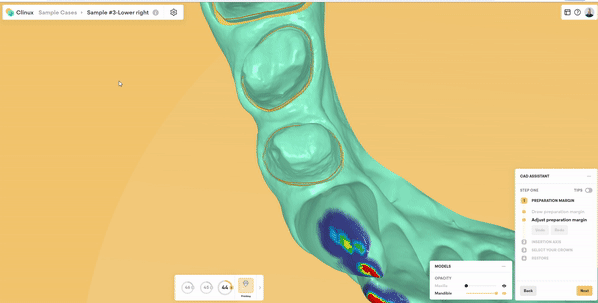
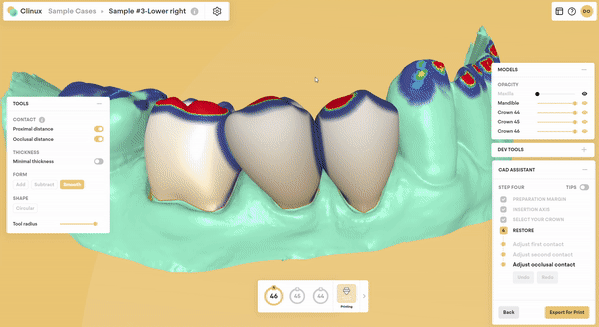
Clinux literally stands for Clinical User Experience and what we’ve created, in our opinion, is the simplest way to begin making crowns and night guards in your own office.
Clinux now supports the following additional export options via Clinux Bridge:
Clinux users also enjoy greater insights when using the Distance Map with penetration values now displaying in increments of 25 microns.
Along with adjusting the tool radius, Clinux users can now adjust the strength of the Form Tools when designing their final restorations. Use the new slider on the TOOLS panel when designing with the Add, Subtract and Smooth tools.
This release provides users with far greater flexibility when configuring their Prosthesis Spacer parameter, both in Settings and for individual cases in Case Parameters. The Spacer can now be set in increments of 10 microns from 0 to 250 microns.
The latest Clinux release introduces an Onboarding flow that informs new users how to install Clinux Bridge (Windows only) and set their Cases Folder. We also have a step-by-step guide that brings users through the dashboard and sample cases, along with an additional onboarding for setting your personal design preferences.
We have also updated the way we export completed restorations. Design your prosthesis or splint as usual, then once you reach the export step, you will see a new export modal slide in from the right-hand side of the canvas. This modal provides an overview of the restorations that are ready to be printed or milled, which can be exported to your chosen CAM or your Cases Folder. Users with both milling and printing configured can move prosthesis restorations between tabs using the additional menu.
Also included in this update is that Clinux now automatically saves your designs so they may be re-opened and edited at any time. This new feature is particularly helpful when designing multi-unit cases.
This release introduces v1 support for creating database crowns and copy crowns concurrently. Import your multiple crown restoration case into Clinux as usual. If not automatically detected, then open the Case Information modal to configure your case. On the Indication Information tab, add restorations by selecting additional teeth in the odontogram. Make sure you select either Database or Copy design mode for each tooth.
Once your restorations are complete and you confirm changes, you will see these in the new Selector panel at the bottom of the canvas. This new tool contains the Restoration Details for each tooth allows you to switch between restorations. Complete the CAD ASSISTANT steps for each tooth before exporting the completed restorations.